By: FlashSpeed Foundation Since: Feb 2020 Licence: MIT
1. Introduction
FlashSpeed is a text-based flashcard application specifically designed for university students who are learning a foreign language. University students often have hectic schedules. With this in mind, FlashSpeed was created to allow students to be able to study and revise foreign vocabulary on the fly. With a single command, you can start a quick study session on FlashSpeed whenever!
Keeping, flipping, and tracking physical flashcards can be a pain. FlashSpeed enhances the studying process by having virtual flashcards and a smarter review system. Users will be tested more frequently on flashcards that they had trouble memorizing previously. By using FlashSpeed, you will learn faster and remember for longer!
This guide will walk you through the many exciting features of FlashSpeed as well as give step-by-step instructions on how to use them. Helpful tips and notes are also provided!
We hope you enjoy using our app. Happy FlashSpeeding!
2. Language Support
FlashSpeed can support almost every popular language and their associated script. You can even use emojis in your cards! 😍
You can use FlashSpeed to study:
-
Japanese
-
Korean
-
French
-
Spanish
-
German
-
Hindi
-
Russian
-
…and many more!
| The display of the characters may be limited to your own operating systems’s language support. Please refer to your operating system’s manual or user guide to find out the languages and scripts supported. |
| Technical info: FlashSpeed, which is built with Java, supports the Unicode standard with UTF-16 character encoding for textual representation. |
3. Quick Start
Getting FlashSpeed up and running is fast and easy. Follow these simple steps to get started!
-
Ensure you have Java
11installed in your computer. -
Download the latest
flashspeed.jarfile here. This is the entire FlashSpeed app in one convenient package. -
Copy
flashspeed.jarto a folder of your choice. This will be FlashSpeed’s home folder. All files created by FlashSpeed will be automatically stored here. -
Double-click
flashspeed.jarto start it. FlashSpeed will appear in a few seconds. -
Type a command in the command box and press Enter to execute it.
e.g. typinghelpand pressing Enter will open the Help window. -
Some example commands you can try:
-
createJapanese 1: creates a deck namedJapanese 1in the library -
remove3: removes the 3rd deck shown in the decks list -
exit: exits the app
-
-
Refer to Section 4, “Features” for details of each command or Section 6, “Command Summary” for a condensed view of all commands.
4. Features
Command Format and Input
-
Words in
<>are the command parameters to be supplied by you,
e.g. for the command format ofcreate <deck>,<deck>is a parameter of your choice, such ascreate Japanese 1. -
All parameters will have any leading and trailing whitespace removed before being processed,
e.g.<deck>is equal to<deck>.
Different Views
A view is simply the state or mode of FlashSpeed you are in now. You will be able to identify the view you are in from what you are currently seeing in FlashSpeed.
| Some commands only work in certain views. Don’t worry, this guide will tell you all you need to know! |
FlashSpeed can be in one of 3 different views, namely:
-
Library view: when no deck is selected and no cards are shown

-
Deck view: when a deck is selected and its cards are shown

-
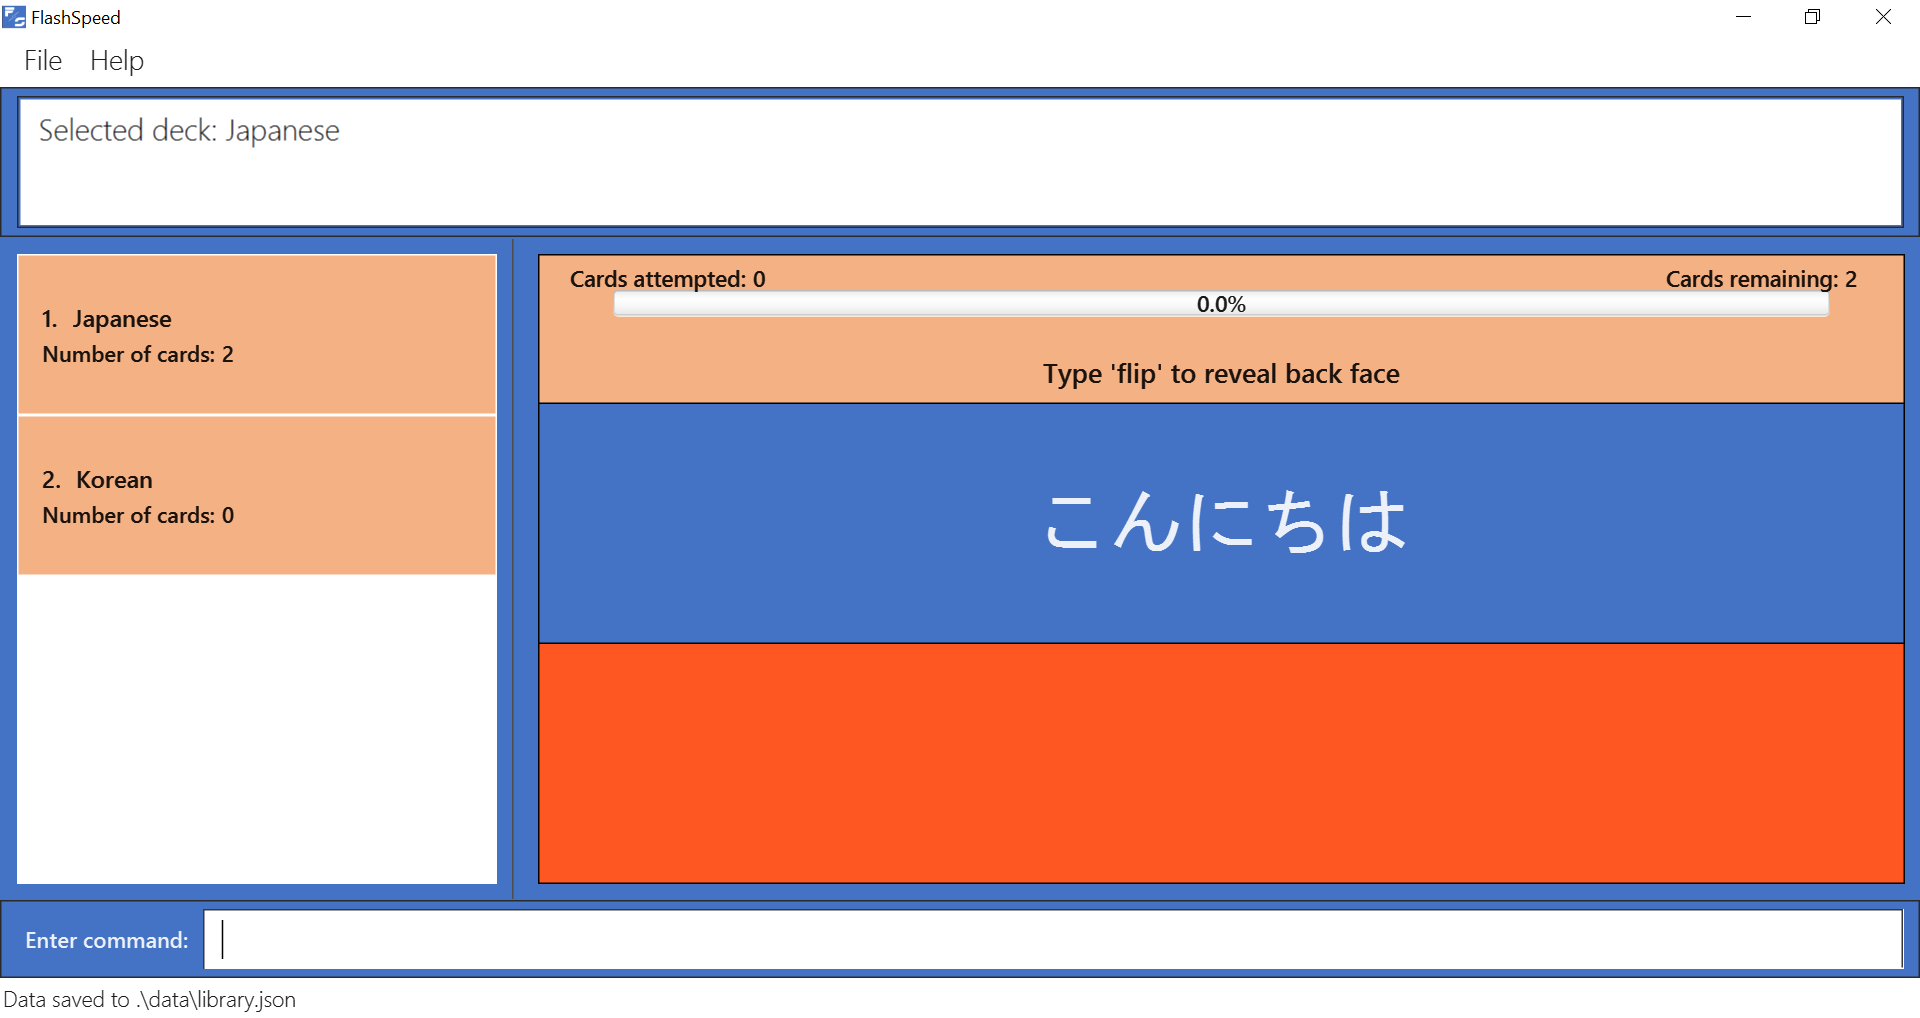
Play view: when in a study session of a deck

4.1. General
4.1.1. Viewing help : help
Format: help
You can view this user guide in a new popup window by
typing help in the input box and pressing Enter.
| You can close the help window either by clicking on the close button or pressing Alt+F4 while the help window is in focus. |
4.1.2. Exiting the program : exit
Format: exit
You can exit FlashSpeed by typing exit in the input box
and pressing Enter. Bye!
4.1.3. Resetting the library : reset
Format: reset
If you want to delete everything in the library to start fresh, you can choose to reset the library.
Simply type reset in the input box and press Enter.
| You cannot reset the library while in Play view. |

4.2. Library view
4.2.1. Creating a deck : create
Format: create <deck>
After downloading and setting up FlashSpeed, you’re all set to go! But before anything else, you will have to first create a deck. The process of creating a deck in FlashSpeed is easy.
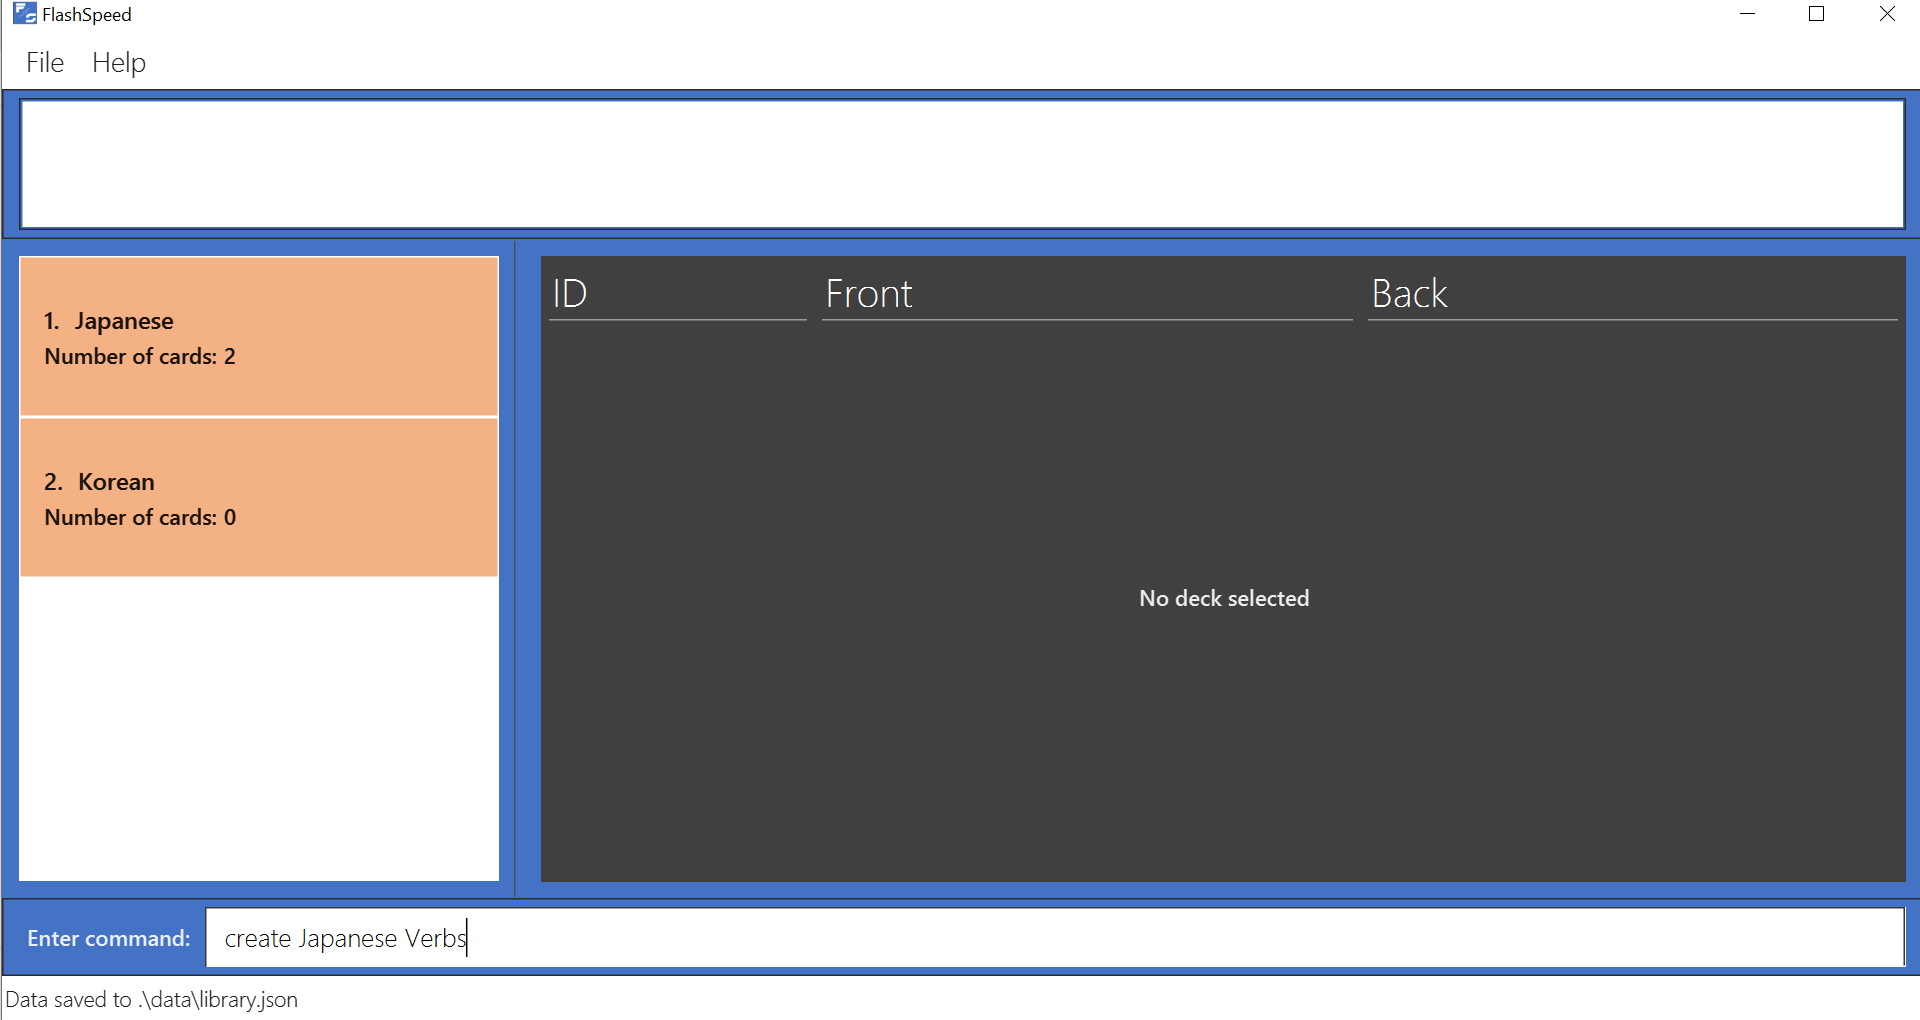
Let’s say you want to create a deck to revise some Japanese verbs to prepare for your upcoming test. To do so:
-
Firstly, type
createfollowed by the deck name into the input box.-
e.g.
create Japanese Verbs Figure 6. Typing the command to create the Japanese Verbs deck.
-
-
Press Enter.
-
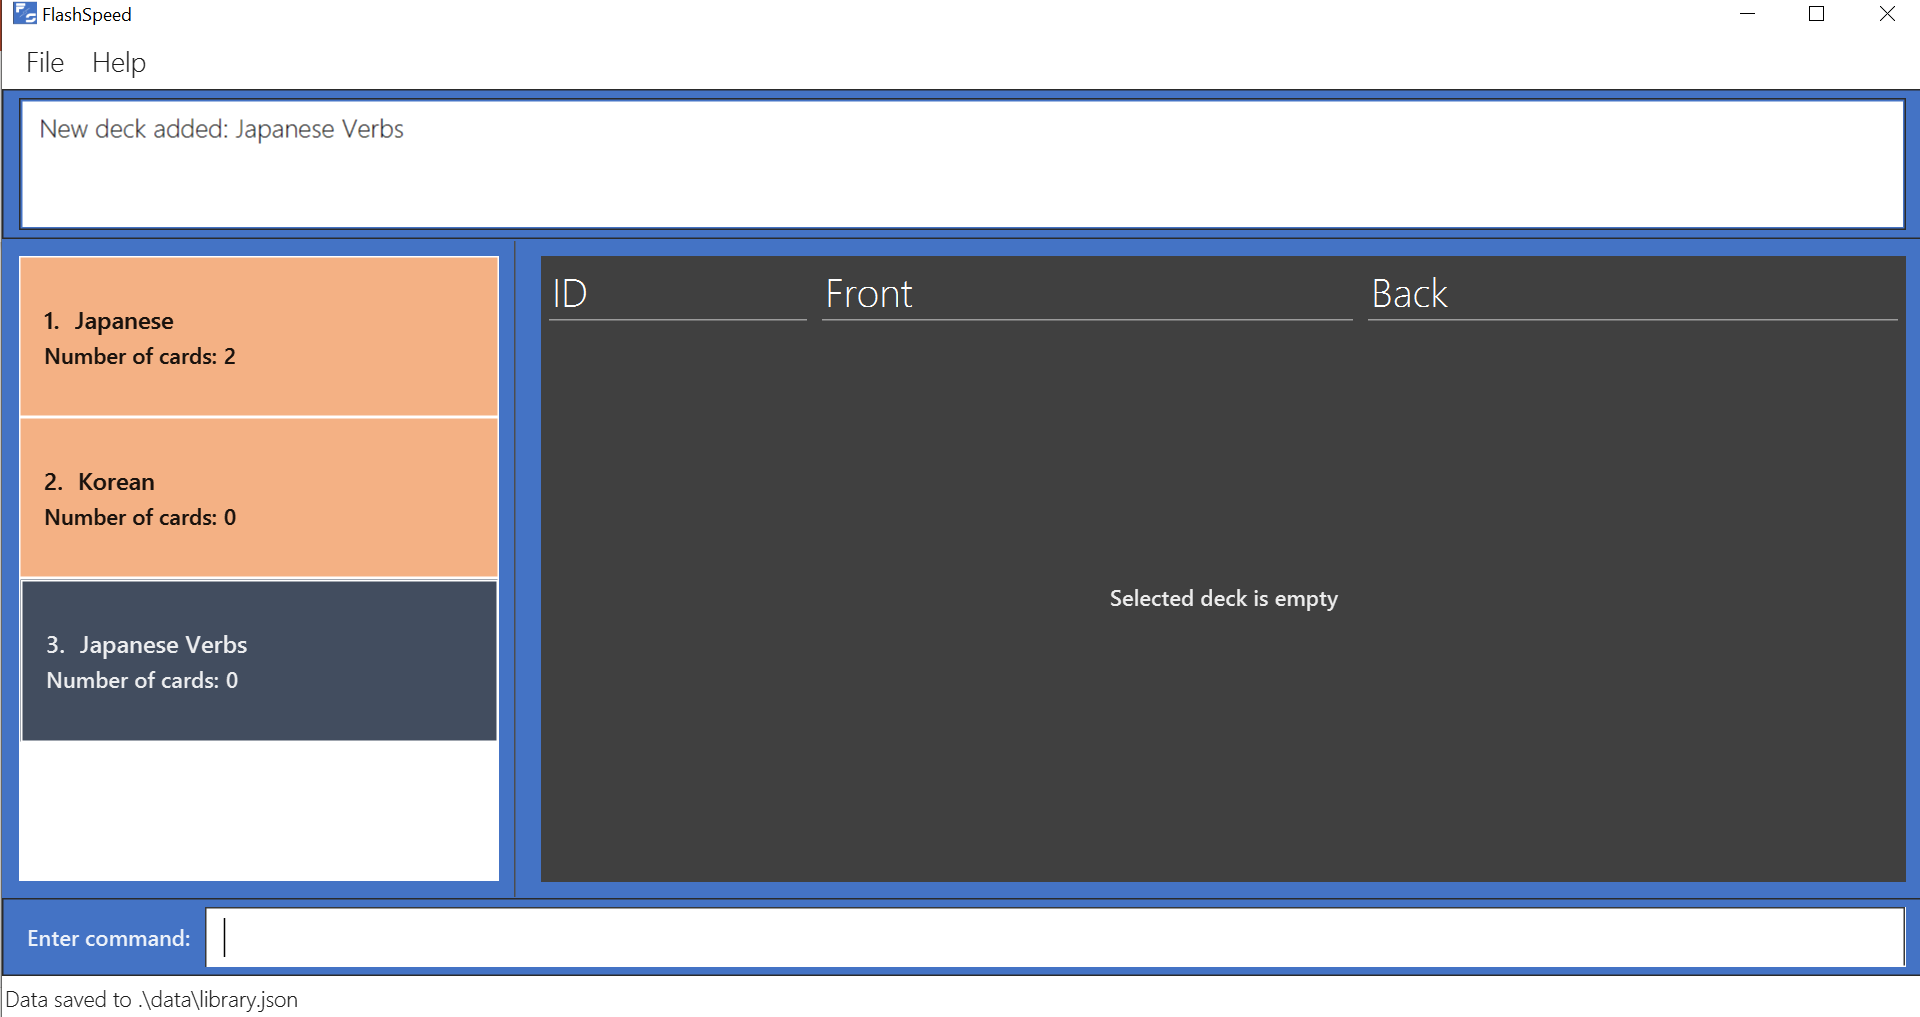
Voila!
 Figure 7. After creating the Japanese Verbs deck.
4.2.2. Selecting a deck : select
Format: select <index>
If you want to view the cards in a particular deck, you can use select followed by the deck’s index number.
The index number is the number to the left of its name.
After selecting a deck, FlashSpeed will enter the Deck view and
show all the cards in that deck.
In the Deck view, you can use any of the Deck mode commands listed in 3.3. Deck view.
Example:
-
select 1
Selects and shows all cards in the 1st deck.

4.2.3. Removing a deck : remove
Format: remove <index>
Similarly, you can remove a deck in the library using remove followed by the index number of that deck. Bye bye, deck!
Examples:
-
remove 2
Removes the 2nd deck from the library.

4.2.4. Renaming a deck : rename
Format: rename <index> <deck>
You can rename a deck in the library using rename followed by the index number of the deck and the new name of the deck.
| The deck name cannot by empty. |
Examples:
-
rename 2 Japanese Verbs
Renames the 2nd deck in the library to "Japanese Verbs".

4.2.5. Playing a deck : play
Format: play <index>
Alright, this is what you’ve been waiting for! In order to start a study session with a certain deck,
type play followed by the deck’s index number and press Enter. Good luck on your learning journey.
FYI: we "play" a deck because learning is fun!
Example:
-
play 1
Starts a study session with the 1st deck in the library.

4.3. Deck view
4.3.1. Adding a card : add
Format: add <front>:<back>
Alright, after creating a new deck and giving it a great name, what’s next? Adding cards into the deck, of course!
Once again, the process is easy:
-
Select the deck to which you want to add cards, with the
selectcommand.e.g.
select 1 -
Inside the input box, type:
-
add, followed by -
the word/sentence that you want as the
frontof the card, then -
a colon ":" right after, and finally
-
the word/sentence that you want as the
backof the card.e.g.
add ありがとう:thanks
-
-
Press Enter.
-
Voila!
 Figure 13. Adding a new card into the Japanese deck.
4.3.2. Editing a card : edit
Format 1: edit <index> <front>:<back>
Format 2: edit <index> :<back>
Format 3: edit <index> <front>:
You can edit the front and/or back values of any card in the current deck.
The way to do so is similar to the add command as shown before.
Type edit, followed by the index number of the card to be edited, then the new front value, then a colon (":"), and finally the new back value.
You don’t have to supply both the front and back values of a card if you only want to change one of them,
i.e. if you only wish to change the back of a card, front can be left blank, and vice versa.
|
Examples:
-
edit 2 ありがとう:thanks
Edits the front and back values of the 2nd card in the deck to beありがとうandthanksrespectively. -
edit 2 :thanks
Edits the back value of the 2nd card in the deck to bethanks. -
edit 2 ありがとう:
Edits the front value of the 2nd card in the deck to beありがとう.

4.3.3. Deleting a card : delete
Format: delete <index>
You can delete a card from the selected deck by using delete followed by the index number of that card.
Examples:
-
delete 3
Deletes the 3rd card in the current deck.

4.3.4. Returning to the library : return
Format: return
Once you’re done viewing or modifying the selected deck,
you can return to the Library view with return, i.e. no deck will be selected.

4.4. Play view
Format: play <index>
4.4.1. Flipping a card : flip
Format: flip
Are you ready to reveal the back face of the card?
Let’s flip it to check if your memory is spot on.
To flip a card, simply type flip into the input box and press Enter.

4.4.2. Answering : yes/no
Format: yes or no
Were you able to recall the correct back value?
If you could, type yes into the input box and press Enter. Congratulations!
If you could not or your guess was incorrect, type no into the input box and press Enter. Don’t give up!
| You can only answer after flipping the card. |
If you answered no for a card, you will have an opportunity to see it again later in the same session.
FlashSpeed optimizes for cards you find difficult.
|

4.4.3. Stopping a session: stop
Format: stop
A play session will end automatically when there are no more cards to review.
However, you can also stop an ongoing session immediately by typing stop into the input box and pressing Enter.
But of course, try your best and don’t use this too often!
| The session statistics will be shown either after completing a session or after manually stopping. |
| You can close the statistics window either by clicking on the close button or pressing Alt+F4 while the statistics window is in focus. |

4.5. Save data
All data in FlashSpeed (e.g. decks, cards) is saved automatically. It is all neatly placed in the folder you put FlashSpeed in.
You don’t have to worry about saving your precious flashcards manually!
5. FAQ
Q: Does this application require an Internet connection?
A: No, FlashSpeed does not require an Internet connection to use.
Q: What is the maximum length of text I can enter into a flashcard?
A: The flashcard method of studying benefits from succinct and concise flashcards.
Even though FlashSpeed does not limit the maximum length of text that can be entered and stored,
it will only show the text up to the size of the available display space.
Therefore, we recommend keeping any text under 60 characters.
Q: How do I save my data?
A: FlashSpeed automatically saves your data whenever you make a change. There is no need to save manually.
Q: Will my data be sent anywhere else or shared with third parties?
A: Your data is stored locally on your own computer.
FlashSpeed does not use any Internet connection so no data can be sent to any online servers.
Q: How do I transfer my data to another computer?
A: Simply copy the data folder in FlashSpeed’s home folder over to the home folder in the other computer.
Q: How do I update FlashSpeed to the latest version when there is an update?
A: You can check for any updates to FlashSpeed here.
You can then follow the same instructions as found in Section 3, “Quick Start”.
Q: I am not able to run this application. What can I do?
A: Refer to Section 3, “Quick Start” for the installation guide. Ensure that your computer has Java 11 installed. FlashSpeed may not be able to run on other versions of Java.
Alternatively, you can contact us here for any further help.
6. Command Summary
-
Help :
help -
Exit :
exit -
Reset :
reset -
Select :
select <index>
e.g.select 2 -
Create :
create <deck>
e.g.create Japanese 1 -
Remove :
remove <index>
e.g.remove 2 -
Rename :
rename <index> <deck>
e.g.rename 2 Japanese Verbs -
Play :
play <index>
e.g.play 2 -
Add
add <front>:<back>
e.g.add ありがとう:thanks -
Edit :
edit <index> <front>:<back>oredit <index> :<back>oredit <index> <front>:
e.g.edit 1 ありがとう:thanksoredit 1 :thanksoredit 1 ありがとう: -
Delete :
delete <index>
e.g.delete 3 -
Return :
return -
Flip :
flip -
Yes :
yes -
No :
no -
Stop :
stop
| View | |||
|---|---|---|---|
Command |
Library |
Deck |
Play |
|
√ |
√ |
√ |
|
√ |
√ |
√ |
|
√ |
√ |
|
|
√ |
√ |
|
|
√ |
√ |
|
|
√ |
√ |
|
|
√ |
√ |
|
|
√ |
√ |
|
|
√ |
||
|
√ |
||
|
√ |
||
|
√ |
||
|
√ |
||
|
√ |
||
|
√ |
||
|
√ |
||